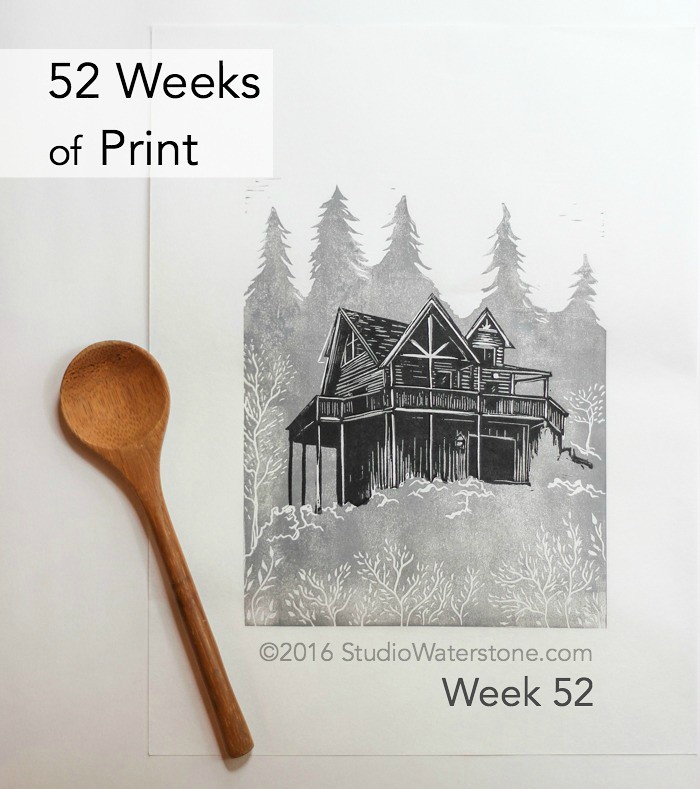
52 Weeks of Print: Week 52 Cabin in the Woods
I'll be honest. Around my house I'm not know as someone who finishes a task. AND this 52 week project ended up taking almost two years - but in my defense I had medical reasons! Anyway....
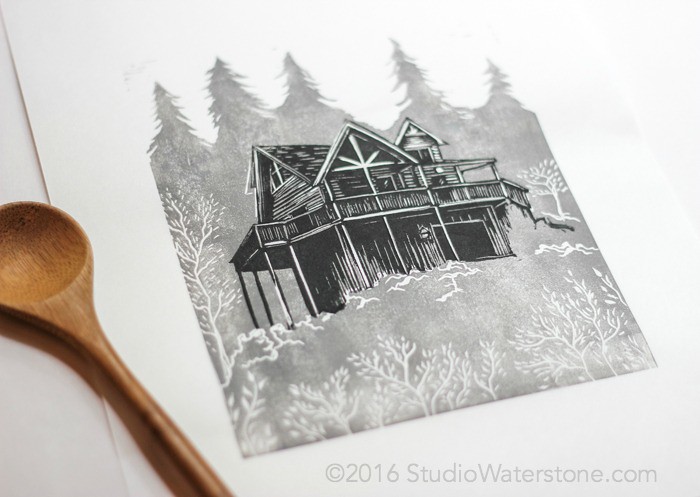
Anyway. It's finished! For the final project, I wanted to create something personal and frame worthy. Our little cabin in the woods fit the bill.
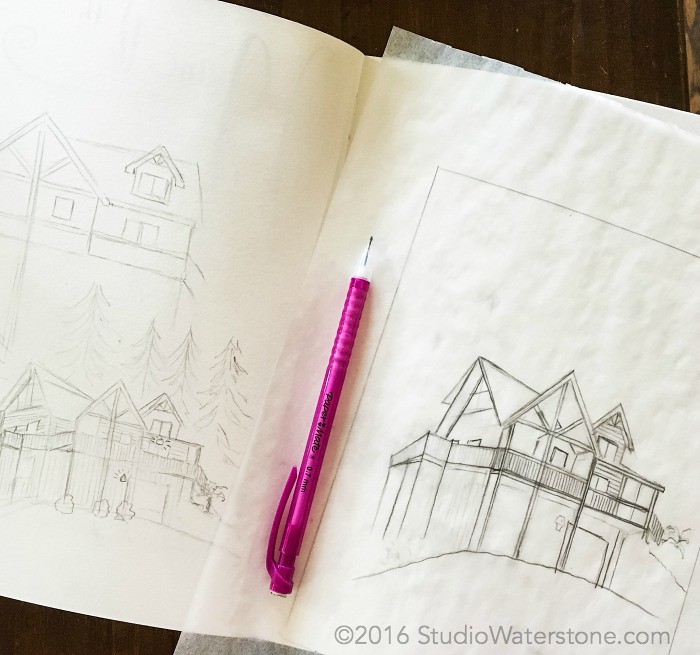
Initial Sketches
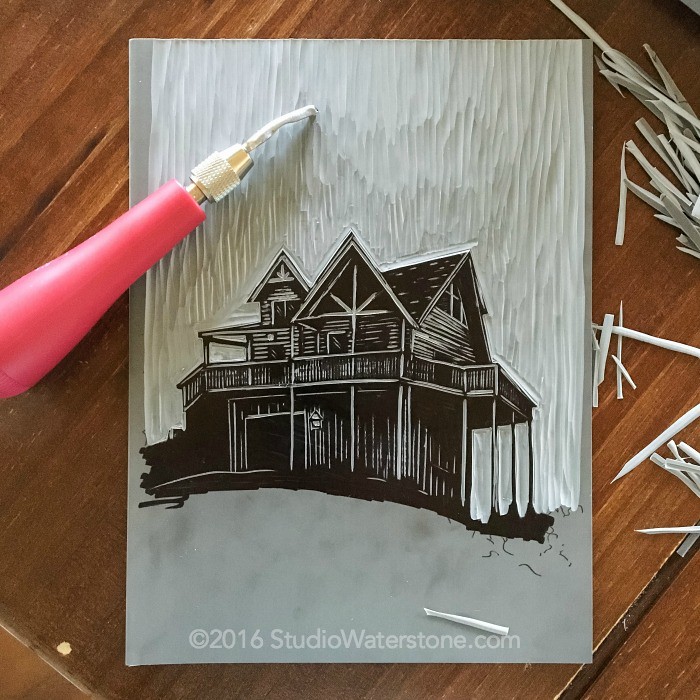
Carving away on the first layer. With this layer I carved away the negative spaces.
I wanted this to be a two color relief print but, boy, I had no idea how tough it would be to settle on a color. I tested about five background colors and finally decided to go with a muted gray. Very happy with the result.
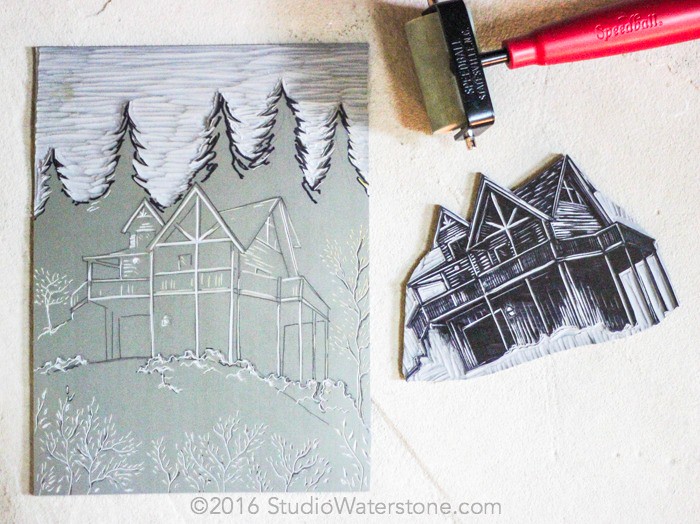
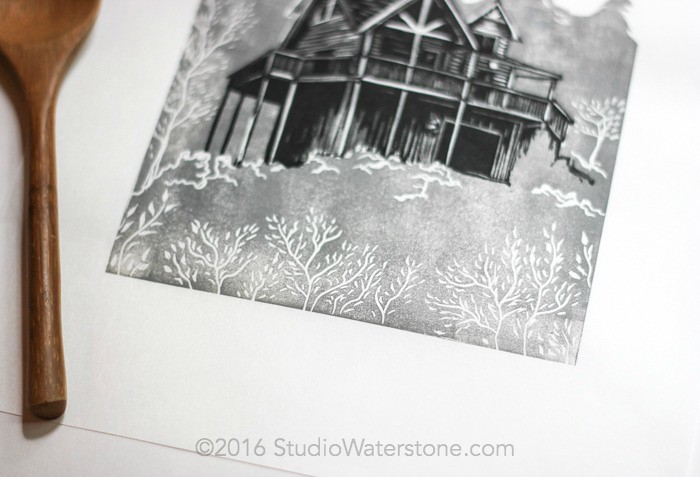
With the background, I carved away negative space at the top around the trees and then carved into the linoleum to get the the "greenery" at the bottom.
The thing is, I have fallen deeply in love with lino carving and creating relief prints. I feel that I've only scratched the surface (no pun intended) and want to continue to explore this wonderful medium. Not sure if the future will hold another creative challenge - hopefully so, but nailing a theme will take some thought.
So, this is it, folks! Week 52 of 52 Weeks of Print. (wah hoo!)
Click here to see 52 Weeks in it's entirety.


What a lovely project! Congratulations with the challenge! So many beautiful things!
ReplyDeleteThank you, Olga. :-)
DeleteAbsolutely stunning!
ReplyDeletewords and pictures
Thanks, Erin!
DeleteWell, that's tenacity for ya! Congrats on completing this challenge- you must be feeling quite proud of yourself!!
ReplyDeleteI have a newbie question: do you have to register your stamps to make the cabin images match? How do you get it in just the right spot?
Haha - thanks! There were times I didn’t know if I’d finish.
DeleteTo answer your question, I first used two same sized plates for carving and planned to use my homemade registration board for the two layers. (I have a tutorial on how I do this here: http://blog.studiowaterstone.com/2016/02/simple-solutions-easy-diy-relief-print.html
After test printing, I realized that the carvings didn’t match up exactly (due to my original sketch transfer) so I trimmed the cabin plate down so that the points at the top of the roof were exact. I was then able to stamp the black image down onto the background, flip it over and rub it to transfer the print.
i came in at week three and have enjoyed watching you grow with the stamps...thanks for letting us go along with you. they are beautiful and this last one is wonderful.
ReplyDeleteThanks Stacey!
DeleteYour work is absolutely amazing L. :)
ReplyDeleteCongrats on finishing your challenge :)
I think having a lot of unfinished projects goes along with being creative, that's my excuse anything, lol :)
Happy weekend, cheers, T. :)
Thanks Teresa. And, yes, I think you're right about the unfinished projects.
DeleteLori, there are truly not enough superlatives to describe just how beautiful I think this one is.
ReplyDeleteYou are truly such a talented artist, and this one is simply "over the top!"
Congratulations on finishing this wonderful project. I have so enjoyed following all that you have done, and I really look forward to your next project.
Happy Sunday to you!
Thanks, Lisa!
DeleteBravo bravo Lori for such an accomplishement, I am totally admirative !
ReplyDeleteYour skills have imrpoved along the months & this last print is just spectacular !
xoxo
Thanks Sonia!
DeleteSo so so beautiful! Congratulations on finishing #52, it's really stunning!
ReplyDelete